Thursday 1 November 2012

1944 Falaise Gap - FoBASM

It's been a while since I have posted, I have been studying part-time while working full-time so blogging time has been short.

I am playing a house ruled version of FoW that I am calling Flames of Bolt Action Shot Mum (FoBASM). The basic premise is that I like playing games that have reinforced companies or several companies, let's say about the forces a battalion commander would commit to a battle. I think FoW has good core mechanics that are simple, streamlined and fun. But I don't like the lack of battlefield friction and all the wonkiness with special rules and their army lists. I really like the blinds system and the command and control system of IABSM, and the ability in Bolt Action to decide which platoon to activate with the colored dice. So I have taken what I like from the three systems and merged them into a game that I think works quite well for what I want.

This scenario is loosely based on a Canadian armored regiment with supporting infantry, and artillery assets assaulting a set of towns in an attempt to close the Falaise Gap from the North. The Germans had an understrength company of SS Hitler Youth supported by platoon of Panthers trying to hold back the tide of the Canadian advance.

The Canadians advanced along the narrow edge from the West, they had to capture at least one of the first hamlets, either the Northern or Southern one and continue to capture the crossroads at the town with the Church at the far end of the table.

Miniatures are 15mm.


The battle from the Canadian perspective, the Canadians need to capture the crossroads on the far end of the table


The Germans deploy to defend the first two hamlets.

Canadian armor advances through wheatfields towards the Northern hamlet

Churchills advance towards the Southern hamlet

The Germans move up their Panther reserves towards the Northern hamlet to counter the Canadian Shermans.

Canadian rifles stalking their way through the wheat fields ready to assault the Northern hamlet.

Either the dug in SS were surprised or the Canadians very lucky as they assault and capture the Northern hamlet. The Canadians lost most of their platoon but captured their first objective.

The Canadians now shift the axis of their attack towards the Southern hamlet.

The German platoon defending the Southern hamlet opens up on the Canadian rifle platoon trying to replicate the success in the North.


The Canadian Shermans pour fire into the German defenders but cause no casualties against the dug in veterans. 

Unlike the first assault, the Canadian rifles attacking the Southern hamlet get mowed down by MG fire.

Canadians moving through the center and the Northern hamlet take out a Pak 40 one the hill and continue to advance.

The Panthers finally get into action and move around the Canadian flank. The Canadians call in an artillery strike and manage to knock out one Panther.

The remaining two Panthers tear apart two platoons of Shermans from the flank. Things aren't looking good for the Canadians.

In the final turn of the game, the Churchills and the last platoon of Shermans assault and breakthrough the Southern hamlet. The Panthers are once again caught by artillery and some unlucky rolls knocks out them both out. With the road to the crossroads clear, and their Panthers knocked out, the Germans have little left to fight with and we call the game for the Canadians. Albeit it was mostly a Pyrrhic victory as the Canadians lost their HQ almost all of their Shermans, and two platoons worth of infantry.


Friday 11 May 2012

The Solomons Campaign: Turn 4 & 5 AAR - Taking Stock

Game and scale: We are using General Quarters 3 to play the tactical battles, and The Solomons Campaign from the same publisher (ODGW) for the campaign. All ships are 1/6000 Figurehead.
What’s Happened So Far: Turn 3 was the turning point in the campaign, the IJA successfully assaulted and took Henderson Airfield and now they held the initiative. http://micromegasatwar.blogspot.ca/2012/03/solomons-campaign-turn-3-aar-empire.html
November 1942
Weather forecast: Overcast (add one to the weather roll)
Turn 4: In this turn his turn the IJA player was pre-occupied with supplying the newly taken airfield and shoring up its position. The IJA’s carrier force had been devastated in the previous months and they only had escort carriers available, therefore as the IJA player I had to leave my carriers at port in hopes that I would get a fleet carrier back in the next turn.  Since my main goal was supply of my island I decided to also send out a bombardment force to attract his attention away from my supply mission and to cause some havoc amongst the retreating Marines on the island.
The USN player predictably sortied his superior carrier force; by luck they were unable to locate my bombardment mission. Since they had just lost Henderson airfield the US player didn’t have enough initiative to attempt a counterattack and so spent his turn also resupplying the Marines on the island.
Turn 4 was pretty quiet as both sides shored up their positions and adjusted to the new reality. Only two turns were left in the campaign.

December 1942
Weather Forecast: Severe weather (add five to the weather roll)
Turn 5: After a rather timid Turn 4, both sides went back to work in their desperate fight over Henderson Airfield. The IJA got their fleet carrier Zuikaku back into action and so were able to sortie their carrier fleet while the USN tried to press home its advantage in carriers. This turned out rather disastrously for one side. On the surface both sides went to work to shore up and supply their land units on Guadalcanal. For my part I knew that in order for the Marines to assault Henderson they would need to be supplied so I launched a kamikaze style patrol mission with my surface ships in order to disrupt his offloading operations.

Carrier Engagement: In this carrier exchange, the IJA got the strike advantage first and was able to land a crushing blow to the US carrier groups, two of the US carriers were disabled and had to retreat prior to being able to launch a counterattack.
IJN carrier fleet ready to launch

The surprise achieved by the Japanese planes allows them to land devastating blows to the US carriers


Japanese torpedo planes perform anvil attack on US carrier


Rabaul Patrol vs USN Supply Mission: The USN sent a heavy escort force to accompany and protect their supply mission, the IJN sent just about everything they had in Rabaul to try and intercept this supply mission. While the IJN were outnumbered and outgunned their goal was to prevent the transports from unloading. They were ultimately successful in this goal, although they lost almost their entire patrol formation, the emperor will honour them in the afterlife.
Weather called for squalls and high winds making targeting and visibilty a challenge

A US task force of a battleship escorted by cruisers emerges from a squall and targets the approaching Japanese at full range.

The Japanese approach in a double line, the southern cruiser squadron remains hidden by the destroyer screen which takes the brunt of the initial salvos.

The Japanese player makes an aggressive move towards the US transports, having to fight through two heavy US squadrons and a destroyer squadron whom manage to cross their T. The IJN DD screen is virtually wiped

The IJN cruiser squadron sees the transports in the distance but is blocked by US destroyers, on their flank a heavy US squadron of BB's and CA's is bearing down on them. Off to the left of the screen another US heavy squadron fires deadly salvos.

Torpedo ally, as both forces close in they release torpedoes. At this stage the Japanese cruisers have a clear line of site to the transports and manage to land a few salvos, disrupting their supply mission.

The cruiser squadron is a burning heap and in disarray, the DD squadron is wiped out. After suffering heavy fire, point blank torpedoes, they still completed their mission and prevented the USMC from receiving supplies, albiet at a heavy cost.


Conclusion: The interruption of the supply mission ultimately meant that the US Marines couldn’t assault Henderson, with only one more turn left this means the USMC will have on opportunity left to take back the airfield. I don’t have enough ships left in Rabaul to be able to disrupt all of the USN’s supply missions, therefore this campaign will essentially come down to the final die roll when the USMC manage to assault the airfield. I feel that my strategy so far has paid off, I’ve had to pay a high price in ships to gain and maintain my position, but ultimately I am poised to win the campaign.

Tuesday 10 April 2012

Roman Civil War - Impetus AAR

We played a Roman Civil War game last week, the scenario was a Roman General from the Danube front with German allies marching towards Italy to proclaim himself as Consul. This wasn't based on any specific battle but it's a situation that came up only several hundred times in Rome's history.

Game Details: Impetus rules, 25/28mm miniatures, 400pts per side.

I was the Roman rebel general with the German allies and my opponent was the Roman Consul. My strategy was to use my impetuous Germans on the flank to overwhelm the opposing forces and also my cavalry superiority to outwork his flanks. My opponent formed into a very condensed mass of infantry with his flanks protected by natural obstacles which should've played into my strategy.

I made a critical mistake in my set up, for some reason I thought my German infantry was FL, whereas after putting them in difficult ground I looked down at my list and realized they were actually FP, this resulted in the two units to attack piecemeal. I also risked my German cavalry in a straight forward charge at his auxillaries, gambling that they could be softened up before my strong German infantry could charge home. This is because there is a special rule where Roman auxillaries cancel the impetuous bonus of warbands. I'm not sure how I feel about the historical accuracy of that rule, but it does make auxillaries very useful and gives the Romans an important chance against those strong large units of warbands. Anyway, my gamble didn't pay off and my German flank was wiped out.

On the other flank, however, my Roman legions with the help of some light cavalry smashed the opposing legions. This caused the battle to essentially pivot and I sent in my general's unit to restore the situation on my left flank. Each side was pretty much on the verge of breaking, both having lost their smaller command, when my general was captured in battle. Once my troops saw their commander being captured they didn't see the point in fighting on and laid down their arms in hopes of getting amnesty. My general's head was later unceremoniously chopped off and order was restored to the Empire.

Thanks to the following two blogs for lending me their photos:
http://themonkeythatwalks.blogspot.ca/
http://miniaturewar.wordpress.com/


Starting formations with my rebels on the right side of the pic


My right flank
  
My left flank


My opponent's condensed formaton

Another view of my opponents formation

My Romans advancing

My German cavalry charging forward

My legions advance on my right flank as the Germans attack is broken up due to terrain.

Second last turn of the game, my legions on the right break through as my general shifts to plug the hole on the left. He was captured by the elite veterans of the enemy which prompted the route of my forces.

Friday 6 April 2012

Alexander the Not-So Great

Impetus Alexander Campaign Turn 1 & 2: Battle of the Granicus River

This is the first battle of the Alexander campaign in Extra Impetus 4. One of my new years resolutions has been to play more campaigns this year and the Alexander campaign is the second one I started. It's also the first one I completed because the campaign is basically a series of linked battles recreating Alexander's famous battles, and it goes on until Alexander loses. As it turns out I lost the first battle so voila, a successful campaign done and complete in one night.

So this battle has already been blogged about and detailed by my opponent on his blog
http://themonkeythatwalks.blogspot.ca/2012/03/prince-of-persia.html. I wanted to add a few more pics and since my blog is primarily dedicated to AAR's I wanted to document my Alexander campaign.

My colleague already described the battle in detail so I won't rehash everything that happened other than to say I tried to replicate Alexander's actual tactics from the battle, I got unlucky and while Alexander's unit passed their rally test and was able to take a double move forward, the rest of the cavalry supporting him failed their tests and lagged behind. This got Alex isolated and although he fought an epic couple of rounds against three enemy units he eventually broke and it was downhill from there. I initially put Alexander on the opposite side of my enemy's strong horse archer force to avoid getting worn down from missile fire.

Kudos to my opponent for using some good tactics to beat Alexander and demonstrating how a Persian army could've theoritically defeated Alexander. I think of Impetus as a game rather than a simulation but I still think that the Persians could have used their light horse similar to how my opponent did, by harrassing the enemy formation and causing his lines to lose their lose cohesion rather than taking Alexander head on.

It's interesting to note that in the actual battle Alexander found himself isolated and even got injured before his support caught up to him. So this is a very realistic alternative outcome, imagine how the history of the world would've been different.


Persian and Macedonian Army Deployment
Macedonian phalanx in the centre

Persians have a strong left wing

Alexander and his cavalry on the Macedonian left advance through the river

The Macedonian right skirmishes with the Persian horse archers

Alexander is across the river but the rest of the Macedonians are slowed down

Alexander's fateful and heroic charge

The phalanx advances under a hail of arrows

Alexander very uncharacteristically running away

The phalanx is finally across the river and engages the Persian centre

Meanwhile the Persian left has totally wiped away the Macedonian right wing. This is about where the game ended with a Macedonian loss.

Sunday 11 March 2012

The Solomons Campaign – Turn 3 AAR - The Empire Strikes Back

October 1942
Turn 3: This turn once again saw lots of aggressive action by both sides and some dramatic outcomes that have changed the face of the campaign. Both sides once again sortied a carrier group resulting in devastating losses to one side’s carrier capacity. The Yamato finally set sail and let loose its guns albeit not on the intended target. The Japanese efforts to supply their forces on the island finally put them in a position to assault Henderson airfield, but you’ll have to read below to see the results.
Weather forecast: mostly clear (ie: no modifications to the weather roll).
Game and scale: We are using General Quarters 3 to play the tactical battles, and The Solomons Campaign from the same publisher (ODGW) for the campaign. All ships are 1/6000 Figurehead.
What’s happened so far: Turn 2 (link: http://micromegasatwar.blogspot.com/2012/01/solomons-campaign-turn-2-aar.html) saw some heavy combat around IJN supply missions. The IJN were successful in supplying their troops on Guadalcanal but at a heavy price in combat ships.
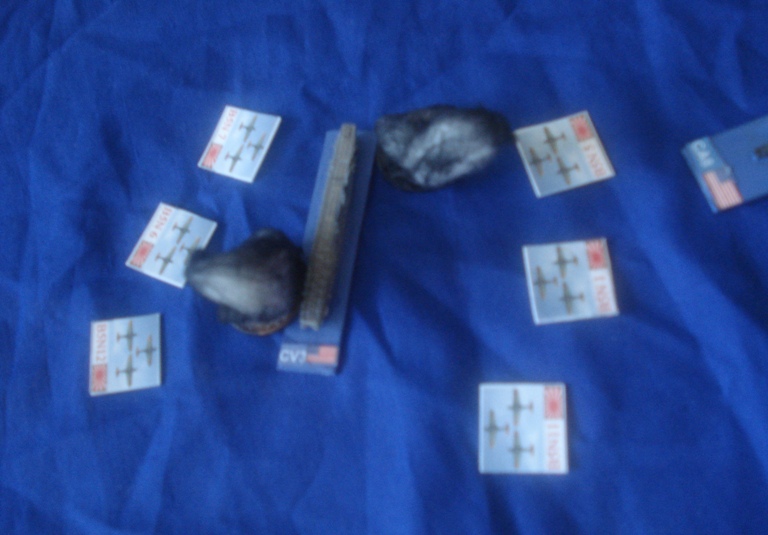
Carrier Engagement: For the third straight turn both sides sortied a carrier group. The weather was moderate and mostly clear. The US sortied two CV’s and the IJN sortied CV Shokaku, and CVL’s Hiyo and Junyo. On the first round both sides launched their planes simultaneously, the US airplanes found their targets while the Japanese pilots got lost en route and had to abort their mission. This had some devastating effects on the Japanese Carrier Group as they didn’t have their CAP ready and prepared. In the ensuing air strike the Shokaku was disabled,  the Hiyo was completely crippled and out of the campaign, and the Junyo took some hits but was still functional. Fires on all three carriers prevented a counterstrike so the IJN carrier group withdrew to lick its wounds, the US follow up strike was unsuccessful in finding the withdrawing group.
US Carrier Group

IJA Carrier Group with Shokaku, Junyo and Hiyo

US Carrier Saratoga

Shokaku is attacked by Torpedo Bombers

Junyo taking hits by US Dive Bombers

Japanese Carrier force on fire just before withdrawing.

Truk Bombardment Force vs Allied Patrol: In my bid to take Henderson airfield I brought out the Japanese big guns. The bombardment force ran into an US Patrol, and initially I tried to avoid contact so that I could continue on with the mission. Unfortunately for the US, they engaged my destroyer screen before I was able to withdraw, so I had no choice but to turn my guns around and engage the patrol in return. I had a significant advantage in firepower and made my opponent pay, just about every ship of his squadron was either sunk or crippled, even more damaging was his battleship that took two torpedo hits and was out of the campaign.
US Heavy Cruisers pursuing

IJA destroyers screening the bombardment force while the US pursue.

The Japanese turn and train their heavy guns on the US Cruiers and Battleship divison

Japanese heavy cruisers and Yamato light up the light up the Allied ships

Meanwhile on the other side of the battlefield the Japanese destroyers run into the USS South Dakota, despite taking heavy fire they let loose torpedoes and land enough to take the US ship out of the campaign.

Supply Missions: The Tokyo Express successfully completed another run to give the assaulting forces enough material to amass their attack. Meanwhile the US also sent two supply missions that were unmolested.
BONZAI!: The Japanese gather their martial spirit and assault Henderson airfield. Their force of will proved to be too much for the Marine defenders as the Japanese successfully wrested control of the airport. I needed to roll a 1-3 on a D12 to make a successful assault, and it was important that I did this in Turn 3 because it would get harder with each successive turn of the campaign. We decided to keep things simple and just roll for the assault rather than playing it out on the table.
Japanese Bonzai Attack and take Henderson airfield
The roll that changed the campaign.

Conclusion: Turns 2 and 3 cost me (the IJN player) heavily in terms of surface ships and carriers, but the ultimate goal and key to winning the campaign is the control of Henderson airfield. Despite poor odds I still got a lucky roll and took the airfield. This changes the dynamics of the campaign and opens up many options for me. As long as I didn’t have Henderson I was tied down to a bombardment mission, a supply and an assault mission to try and take the airfield. Now I hold the initiative and the US player is under pressure to take the airfield back. This also breathes new life into the campaign, I think I was on the verge of defeat and wouldn’t have been able to take the airfield if it didn’t happen soon, I was sustaining high casualties and my enemy was only getting more reinforcements.